If you’re into foot photography, you’ve probably noticed how jewelry and toe rings can completely change the vibe of a photo. Whether you’re shooting for art, lifestyle, or fashion, adding jewelry to your shots gives them depth, color, and a bit of sparkle that draws the eye. In this post, I’ll break down why jewelry matters in foot photography, how to style with it, tips on using toe rings, and helpful ideas for beginners.
This post may contain affiliate links. If you click and buy through them, I may earn a small commission at no added cost to you. For more details, see my affiliate disclosure.
Why Jewelry is a Game Changer in Foot Photography
Jewelry isn’t just an accessory in foot photography. It’s a way to highlight texture, bring out personality, and make feet the real focus of your shot. Anklets, toe rings, and delicate foot chains can turn a simple picture into something eye catching, and they create a narrative for the viewer.
Foot jewelry, especially toe rings and anklets, has a long history in many cultures. In India, for example, toe rings (called bichiya) carry tradition and symbolism, often representing marital status. Meanwhile, in the West, these pieces lean toward self-expression and style. This mix of cultural meaning and modern flair makes jewelry extra appealing for photographers who want to tell a story with every photo.
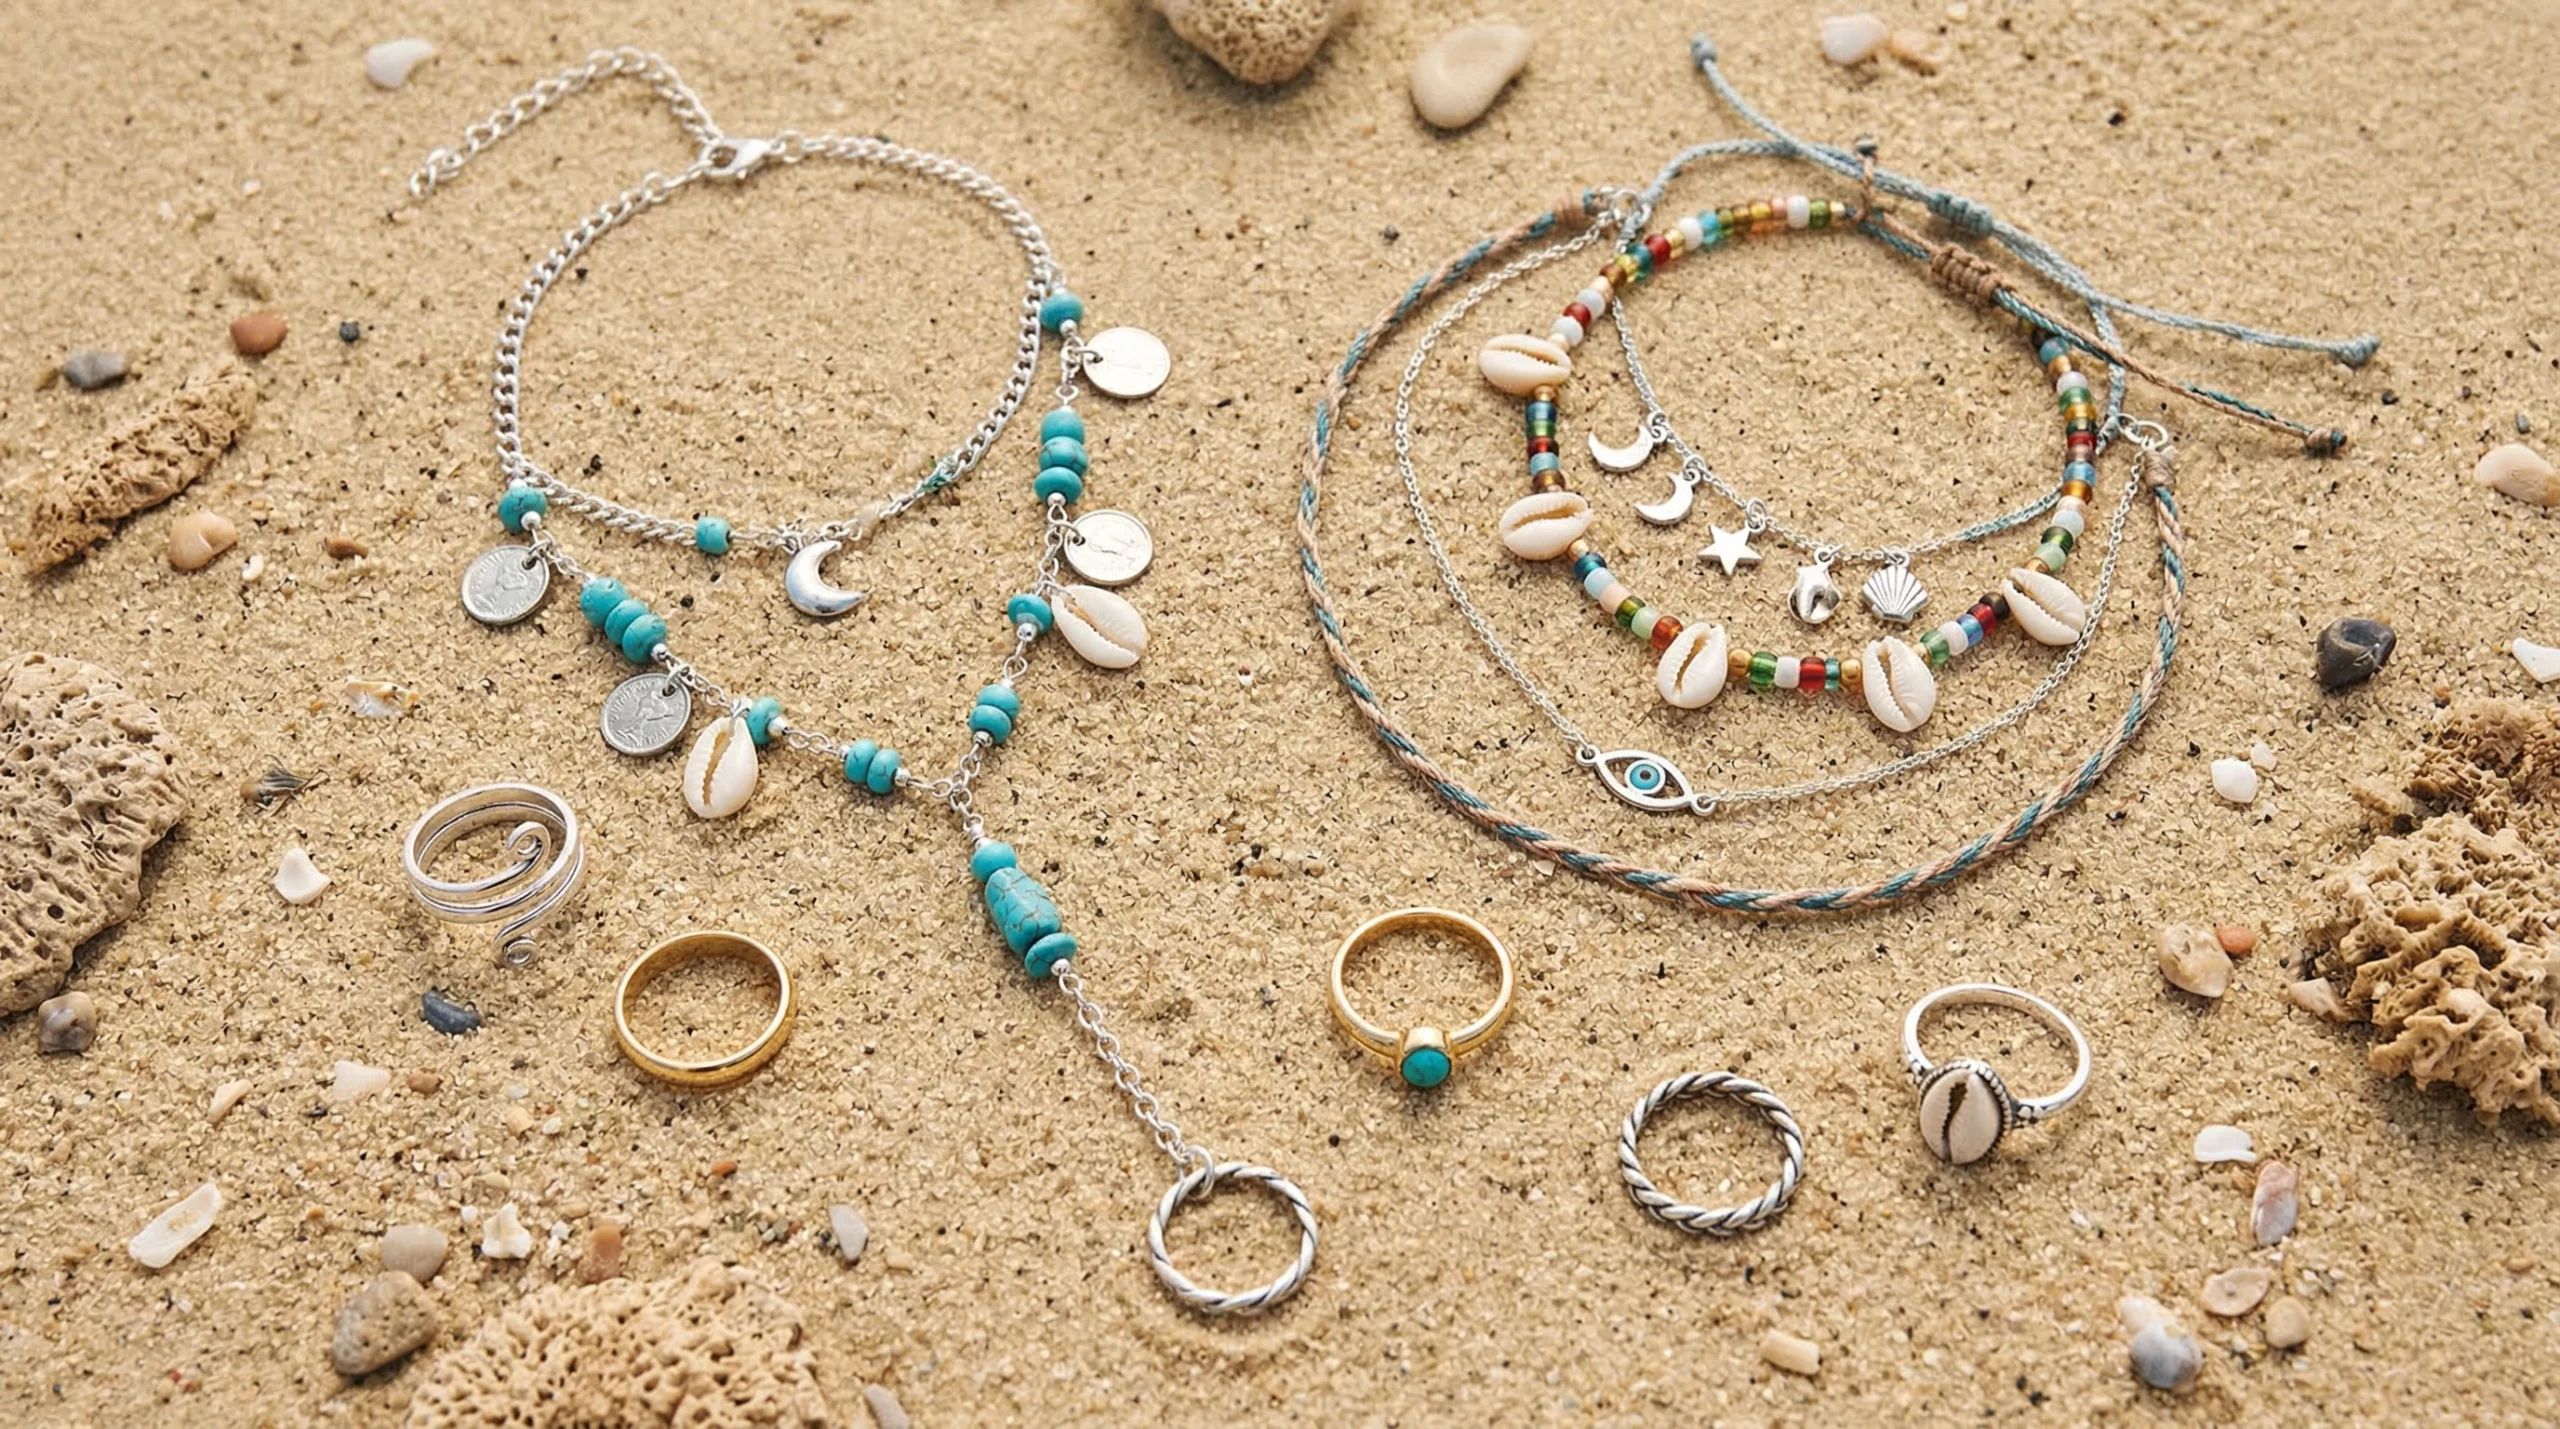
Popular Types of Jewelry for Foot Photography
The options for foot jewelry keep expanding, and knowing what’s out there makes styling your shots more fun and versatile. Here are the main pieces I see people use most:
- Anklets: Simple chains, beaded designs, or statement pieces. I always keep a basic gold or silver anklet in my kit because it works for almost any style. Shop anklets
- Toe Rings: Plain bands, adjustable rings, or ornate designs with stones. These are perfect for closeups or when you want a gentle highlight on the toes. Browse toe rings
- Foot Chains: A combination of anklets and rings, often joined by chains or beads. These are super useful for boho vibes or beach inspired shots. Check out foot jewelry
- Stackable Pieces: Layering several anklets or toe rings is a handy way to create visual interest and texture, especially when shooting for editorial content.
I like to mix and match these pieces depending on the theme of the shoot, the background, and the mood I’m trying to capture. For elegant looks, I go for minimalist metals. For playful or spirited themes, I use colored beads and chunky toe rings.
How Jewelry Steps Up Your Foot Photos
The right jewelry can transform a foot photo in a bunch of ways:
- Adds Focal Points: A shiny anklet or bold toe ring grabs attention, leading the viewer’s eye where you want it.
- Frames the Feet: Jewelry acts almost like a picture frame, defining the shape and setting the tone for the shot.
- Boosts Light and Color: Metallics reflect light, adding a gentle glow, while colored stones or beads give your photos a pop.
- Brings Out Personality: The jewelry you choose can hint at the style, mood, or even the backstory of your subject.
- Breaks Up Monotony: Even a classic, bare foot can look more lively with the simple addition of a ring or chain.
If you haven’t tried jewelry in your foot photography yet, give it a shot and experiment with different looks. I’ve often found that a single anklet or a quirky toe ring can take a photo from plain to memorable in seconds.
Styling Tips: Making the Most of Foot Jewelry
Picking the right jewelry is only half the challenge. Getting it to look great on camera takes a bit of practice and a few handy tricks:
- Match the Jewelry to the Vibe: Go for sleek metals or pearls for elegant shots, or colorful, chunky pieces for fun pics. I usually look at my location and background to guide my decision.
- Pay Attention to Proportion: Small feet or toes often look best with dainty bands, while longer feet can handle thicker or stacked pieces.
- Layer Carefully: Mixing multiple anklets or toe rings works as long as there’s a balance. Too much can look cluttered, but two or three layered pieces can be really effective.
- Keep the Jewelry Clean: Shiny, well kept pieces always photograph better. I use a soft cloth to wipe everything down right before the shoot.
- Let the Jewelry Sit Naturally: Pieces that look forced or stiff can distract. Make sure the rings and anklets sit comfortably for a natural look.
- Highlight with Lighting: A little direct light can bring out shine in gold, silver, or gemstones, adding extra depth to your photos.
Another trick I’ve picked up over time is to use contrasting textures to make the jewelry stand out even more. For example, pairing a highly polished silver anklet with a rough stone floor or arranging a woven bead anklet on soft fabric can make that jewelry pop on camera.
Toe Rings: Small Details, Big Impact
Toe rings are such a simple addition, but they can really take closeup shots up a notch. Since they sit close to the camera’s focus point, toe rings can:
- Add texture and shine right where it matters most
- Highlight nail polish colors
- Create symmetry when used on both feet
- Act as a storytelling element (for instance, a vintage ring can give a retro or heirloom feel)
For anyone new to toe rings, I always suggest trying a few adjustable ones first. They’re comfortable, versatile, and can be worn on different toes to see what works best. Just make sure the fit isn’t too tight. Red marks can ruin otherwise sharp, high definition photos.
What To Know Before Using Jewelry in Foot Photography
Foot jewelry is super useful, but there are a couple of things I’ve learned that help make shoots go smoothly:
- Choose Skin Friendly Materials: Metals like sterling silver or gold plated rings usually work well, but some cheaper metals may irritate sensitive skin during longer shoots.
- Consider Foot Prep: Moisturize ahead of time and check for lint or marks where the jewelry will sit. These details can really show up in closeup or macro shots.
- Test Angles: Sometimes rings or anklets look great from above. From the side or at a diagonal, they might hide a cool detail. I always move around to check different perspectives before settling on a pose.
- Have Backups Ready: Jewelry can break or go missing easily during a busy session. Keeping a few extra rings or chains in your kit prevents delays.
If you want your jewelry to always look its best, avoid lotion or oils right before putting it on. They can dull metal and smudge gemstones fast, meaning more time editing later.
Creative Ideas and Real World Examples
One of my favorite things about foot photography is how easily you can tailor it to a theme using jewelry. Here are a few project examples worth trying:
- Beachy Vibes: Foot chains, seashell anklets, and turquoise toe rings against sandy backgrounds. Picture summer postcards and boho fashion shoots.
- Minimalist Elegance: One thin silver anklet and a nude nail polish for a soft, understated style that’s quick to set up.
- Festival Looks: Bright beads, stacked toe rings, layered anklets, and even temporary tattoos. Great for music or lifestyle campaigns.
- Editorial Shoots: Metallic foot jewelry with bold, contrasting backgrounds. Black velvet or pastel flooring can really make the jewelry pop.
If you’re looking for inspiration, Instagram and Pinterest are packed with accounts that specialize in foot modeling and jewelry photography. Scrolling through these platforms can spark new looks for your shoots, plus you can spot trending color palettes and accessory styles that feel fresh.
Trying out themed projects—like pairing jewelry with seasonal elements such as autumn leaves or holiday lights—also helps you keep your portfolio lively and interesting year round. Don’t be afraid to experiment with props, textures, or bold color backdrops. Jewelry stands out even more when it’s paired with unexpected details, so let your creativity run wild.
Frequently Asked Questions
Here are a few questions I hear about adding jewelry and toe rings to foot photos:
Question: How do you keep jewelry looking good through a whole shoot?
Answer: I carry a small jewelry cleaning cloth and use it between shots. Also, I check for hair, lint, or lotion smudges often so they don’t show up in the final photo.
Question: What jewelry works best for outdoor photography?
Answer: Durable materials like stainless steel or sterling silver handle outdoor elements better. I avoid pieces with glue set stones for the beach or park because sand and moisture can loosen them.
Question: How do you choose the right size for toe rings?
Answer: Adjustable toe rings are easiest, especially for beginners. If you plan to use fitted rings, try a ring sizer, or bring a small selection to test before your shoot.
Final Thoughts on Jewelry and Toe Rings in Foot Photography
Jewelry and toe rings give you so many ways to add style, meaning, and fun to your foot photography. Whether you go all out with bold, stacked pieces or keep things subtle and classic, these little details invite viewers to look closer and appreciate the care you put into each shot.
If you’re shopping for new pieces, anklets and toe rings are both affordable and easy to find. With careful styling and a bit of creativity, your next set of foot photos could be your best yet. Try out different combos and don’t hesitate to experiment—the most eye catching photos often come from the boldest jewelry choices!