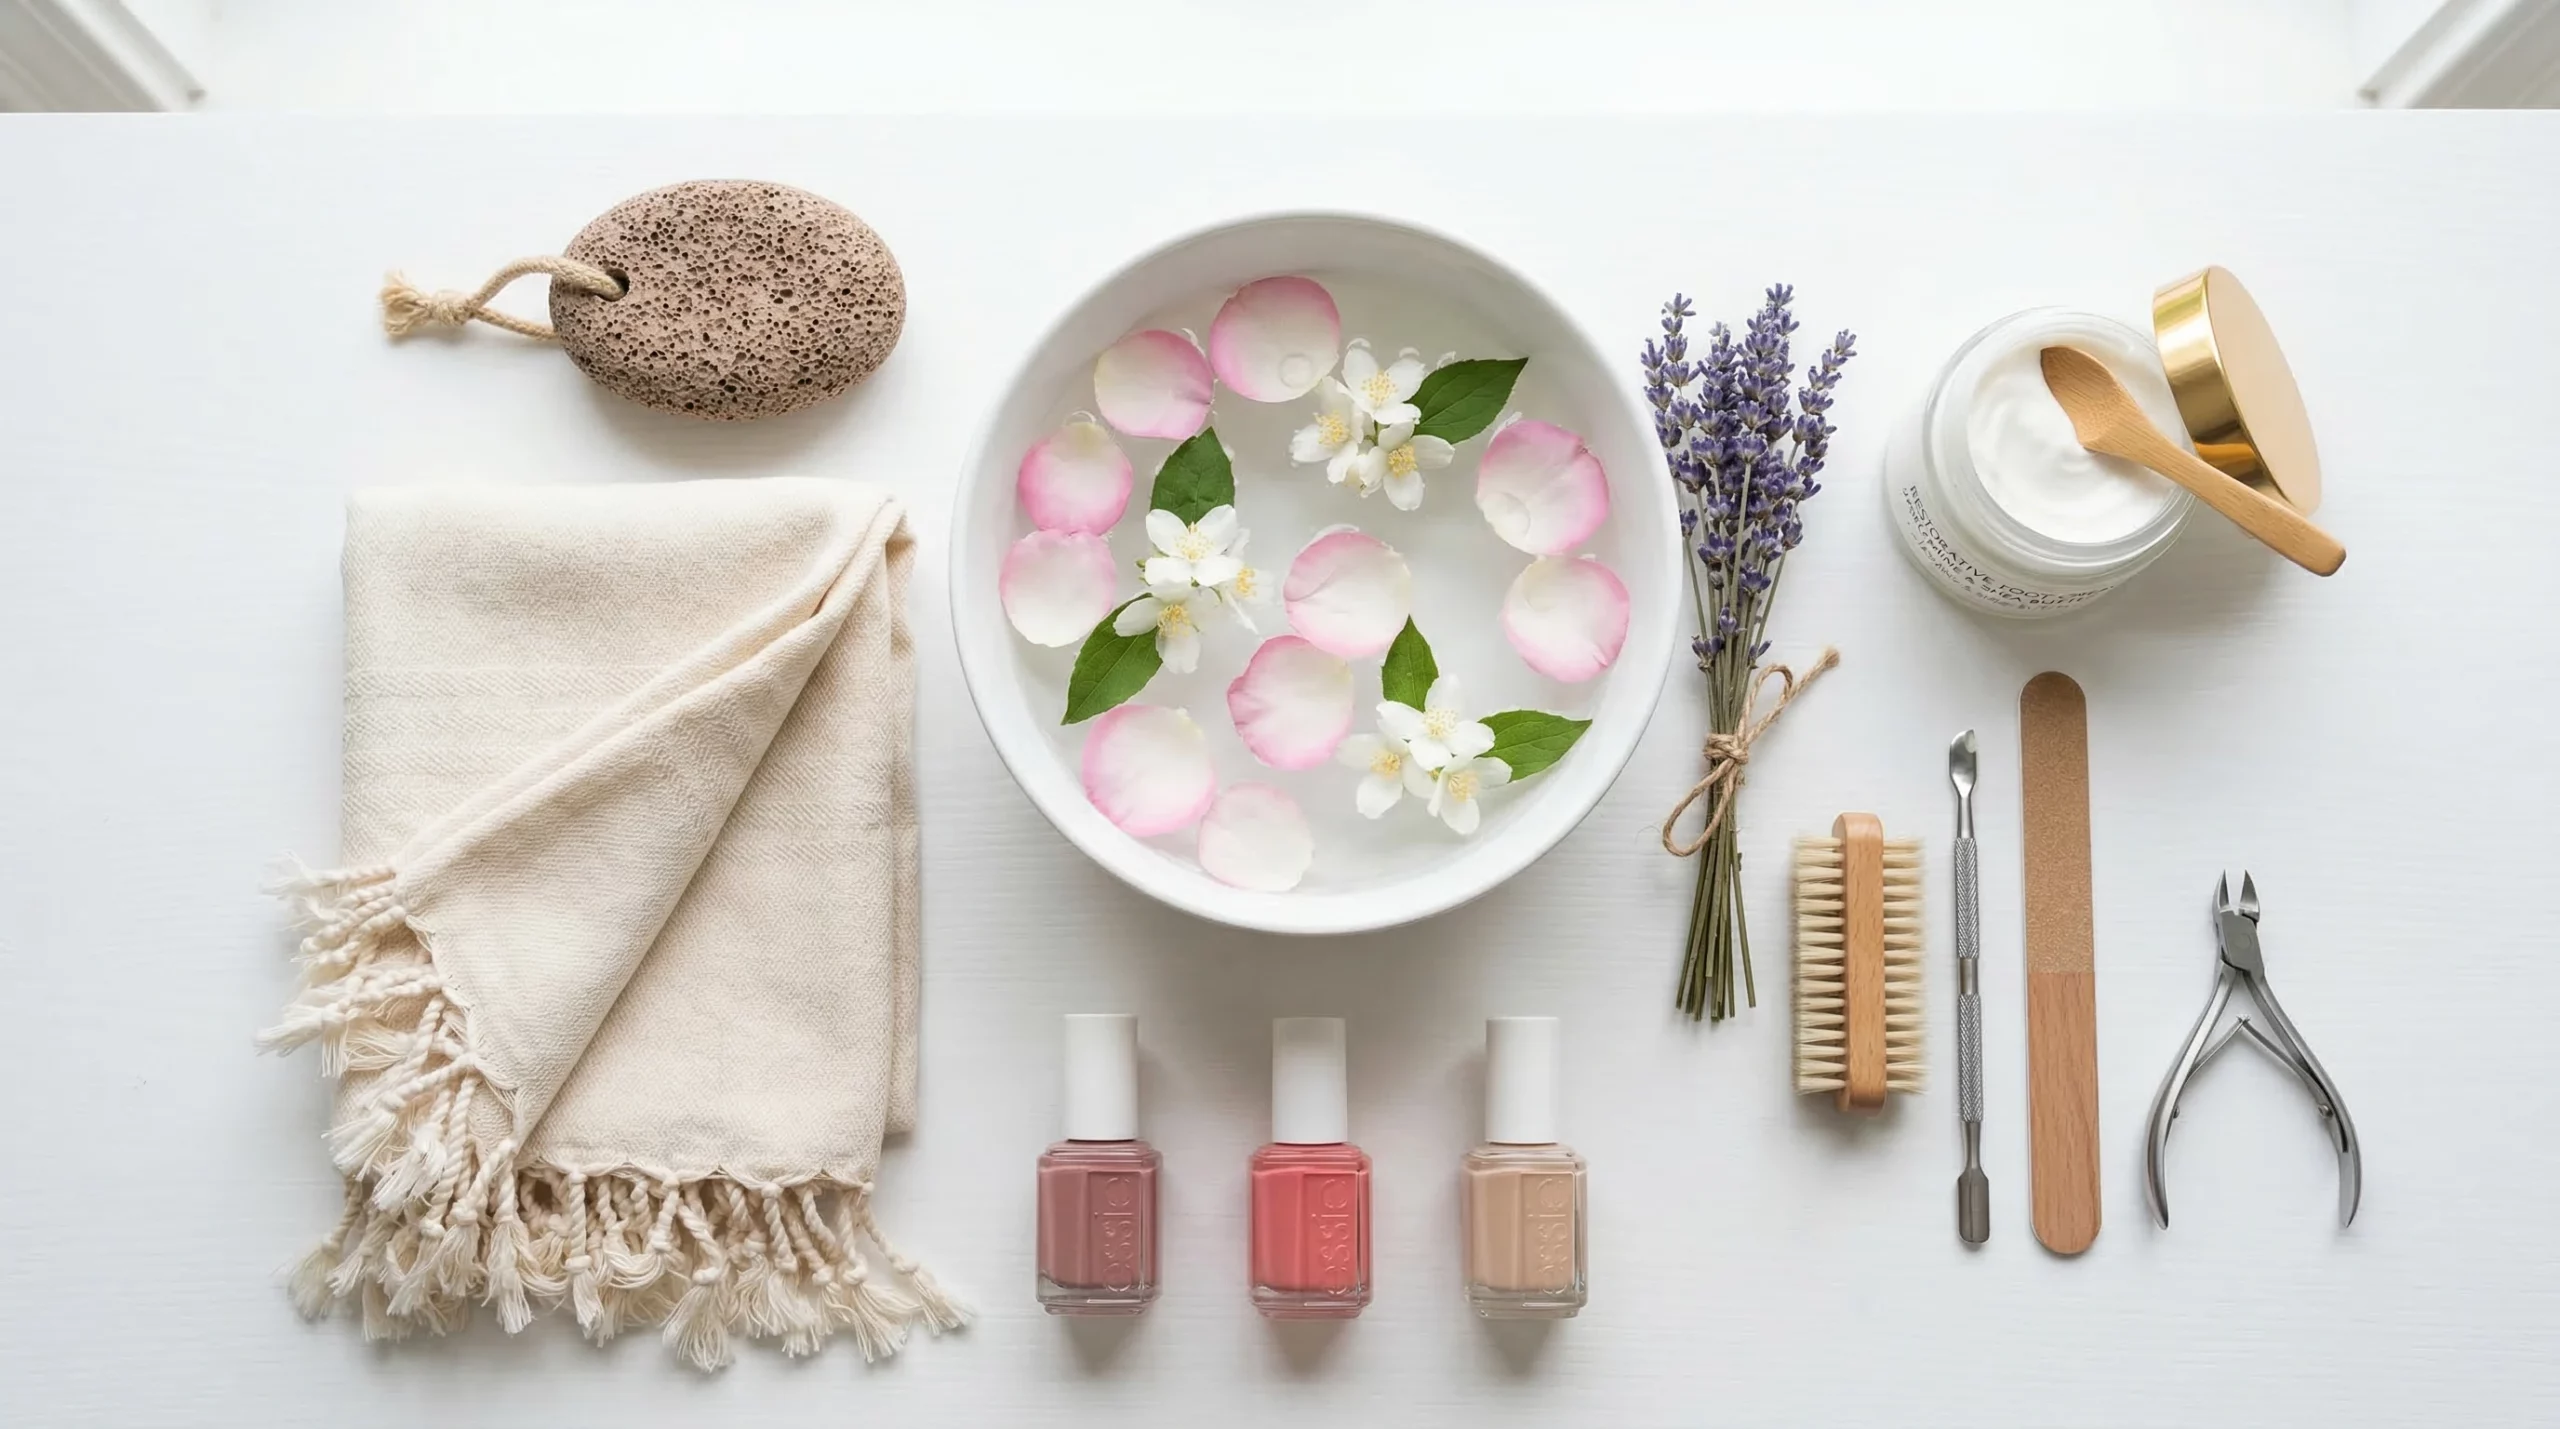
Taking care of your feet can make a big difference, especially if you’ve got a photoshoot coming up. From fashion models to fitness buffs, or even a special portrait session, healthy looking feet help boost your appearance and confidence. It’s easy to forget about your feet, but they’re often on display when you least expect it: open-toed shoes, barefoot shots, or creative poses can mean all eyes are suddenly on them.
If you want smooth, glowing, and fresh looking feet in front of the camera, a good prep routine is your friend. You don’t need to go to a fancy spa. Most of these foot treatments can be done comfortably at home with a little planning. Here’s my take on the top 10 foot treatments to try before a big photoshoot.
This post might include affiliate links. If you click and buy through them, I may receive a small commission (at no extra cost to you). For more info, see my affiliate disclosure.
1. Soak and Relax: The Foundation for Great Feet
A warm foot soak is the best way to kick things off. Not only does it feel amazing after a long day, but it helps soften tough skin and gets your feet relaxed. Just grab a basin, add warm water, and sprinkle in some Epsom salts or a drop of essential oil like lavender for bonus points.
How I Like to Do It
- Fill a tub with just-hot-enough water (not scalding!).
- Add 1/2 cup of Epsom salts.
- Sit, relax, and soak feet for 10-15 minutes.
This step helps loosen dead skin, making the rest of the process much easier and allowing for easier exfoliation later on. Adding some marbles to the basin and rolling your feet over them while soaking can provide a gentle massage as well.
2. Exfoliate for Smoothness
Regular exfoliation removes that dull, dry outer layer and helps reveal soft, glowing skin. If you’re prepping for photos, scrubbing off old skin is a game changer for getting those picture perfect toes and heels. Exfoliation also improves the absorption of moisturizers that come next, giving your feet a truly refreshed look.
Scrub Options
- Use a pumice stone or a foot file to tackle rough areas.
- DIY scrubs work great: try mixing sugar with coconut oil for a gentle (but thorough) buff.
- Some people prefer storebought foot scrubs with gentle granules and moisturizers.
Be gentle, especially if it’s your first time or if you have sensitive skin. Overdoing it can make feet sore or cause redness in photos. For best results, exfoliate two or three days before your shoot, and repeat once more the night before.
3. Trim and Shape Toenails
Trimming and shaping toenails is pretty important for a neat look. Long, jagged, or uneven nails never look good in pictures. Use clean nail clippers and aim for a straight across cut to prevent ingrown nails.
How to Shape Them Right
- Use a gentle nail file to smooth rough edges.
- Avoid sharp corners; rounded corners are less likely to snag and look more elegant.
Even if you’re planning to paint your nails, starting with well shaped nails makes polish look a lot better. Remember, clean under each nail and gently brush away any debris for extra neatness.
4. Care for Cuticles
Cuticles tend to get overlooked but can make a real difference in tight shots. Dry or ragged cuticles can show up in close-ups and are tricky to hide.
Tips for Cuticle Care
- After soaking, gently push back cuticles using a wooden stick.
- Avoid cutting cuticles to prevent infections; just push back and trim any obvious loose bits if necessary.
- Rub a drop of cuticle oil or olive oil in for moisture.
This step keeps your toenail area clean and polished, ready for any nail color or barefoot shot. Regular moisturizing of cuticles also helps reduce the chance of hangnails, which can be a visual distraction when you’re showing off your feet in photos.
5. Hydrate and Moisturize
Nothing kills a nice foot shot faster than cracked, ashy heels. After exfoliating, apply a rich moisturizer. I love using thick foot creams or pure shea butter for serious hydration. Look for creams containing urea, coconut oil, or glycerin, which lock in moisture and improve skin texture. Don’t forget to massage the product into each toe and around the heels. Regular use will give your feet an eye-catching softness that’s great in photos.
For Extra Dry Feet
- Slather feet in your cream of choice.
- Slip on cotton socks and leave them on for a couple of hours (or overnight for a real moisture boost).
Waking up to silky, soft skin always feels great and makes your feet pop in photos. Moisturizing also helps soothe any minor irritation from earlier exfoliation steps, ensuring your skin looks its freshest during your shoot.
6. Address Calluses and Rough Spots
Calluses are normal, but in high resolution images, they can be pretty obvious. Lightly buff down tough spots with a pumice stone after soaking. For stubborn calluses, use a special foot mask or a foot peel product a few days in advance (these often cause peeling that lasts for about a week). Consistent care leads to softer skin over time and makes future prep easier.
If cracks are deep or painful, it’s better to focus on gentle care and moisturizers instead of aggressive filing. Remember, your comfort is just as important as appearance for a confident session in front of the camera.
7. Nail Polish Prep: Polish or Go Natural
Foot nail color can totally change the look of your photos. Decide if you want a pop of color, a classic neutral, or simply a very clean, buffed nail. If you go for polish, use a base coat to avoid staining, and pick high quality, quick dry colors for a smooth finish. Your shade can help match your outfit or the photoshoot theme.
Quick Tips for Long Lasting Polish
- Apply in thin layers; two coats usually do the trick.
- Finish with a clear topcoat for shine and chip resistance.
- If you want a natural look, buff nails gently for a healthy shine.
Let polish dry fully between coats to avoid smudging and make sure your toes are completely dry before slipping on socks or shoes. It’s also a good idea to moisturize around the nail after your polish sets.
8. Address Odors and Freshness
Even the best-looking feet can be quickly ruined by odor, especially when shoes are coming off in the studio. Use an antibacterial foot spray or sprinkle a bit of baking soda into shoes and between toes. Make sure feet are totally dry before putting on closed shoes to keep them smelling fresh throughout the shoot. Changing socks during long shoots helps avoid sweat build up, and a quick wipe with a freshening cloth can work wonders for confidence on set.
9. Treat Blisters or Minor Blemishes
Sometimes, you’ll spot a blister or red spot the night before a shoot. Don’t panic. Apply a soothing blister gel or hydrocolloid bandage overnight. For minor redness or blemishes, a tiny dab of concealer can help. Avoid popping blisters; keep things clean and protected instead. If the spot is sensitive, protect it with a pad or cover, and try to avoid pressure on that area during your session.
Always address any cuts or open wounds with care, as these can show up on camera and slow down healing. Give extra attention to cleanliness to avoid infection and keep the area well moisturized and bandaged until fully healed.
10. Final Details: De-Puff and Pamper
Standing for long periods before a shoot or wearing tight shoes can cause swelling. To minimize puffiness, elevate your feet for 10-15 minutes before heading out. If you want an extra refreshing feeling, try a quick cold water rinse or use a cooling foot gel just before leaving. Rolling your feet over a cold-water bottle also helps reduce swelling quickly.
Bonus Touches
- Brush a little shimmer lotion or highlighter on the tops of feet for subtle glow in close-up shots.
- Avoid lotions with strong fragrances if you have sensitive skin.
Take a few deep breaths and let yourself relax during this final step; a calm, confident attitude will always shine through your photos, too.
Extra Prep Tips for a Flawless Finish
Planning ahead makes a real difference. Start your routine a few days in advance for the best results. If you’re going for a professional pedicure, book it at least 48 hours before your shoot to give your skin time to calm down. This buffer also gives you time to fix any accidental stubs or polish mishaps. Staying hydrated by drinking plenty of water in the days leading up to your shoot can also help your skin look its healthiest.
Bring along a mini kit with moisturizer, nail file, and wipes to your shoot for last minute touch ups. I always find this super handy, especially during long hours on set or when shoes keep coming on and off. A few extra cotton pads and some polish remover can be a lifesaver if you need a quick fix. And if your feet will be in the spotlight, remember to check in with your photographer about any potential close ups so you can do a final touch up just before the shot.
Your Takeaway
Great looking feet don’t require fancy treatments; consistency and a little self-care do the trick. Give these steps a try before your next photoshoot and you’ll walk away with both confidence and great shots. If you have your own favorite foot prep trick, I’d love to hear about it! Remember, the foundation of healthy feet is regular care—so keep these steps in mind year-round for feet that always look and feel their best.